Tomato Blossom End Rot: How to Stop the Next Fruits From Failing
Tomato blossom end rot is a calcium-delivery problem driven most often by uneven moisture, stressed roots, or fertilizer practices that disrupt uptake rather than by a contagious disease spreading through the plant. The fastest way to protect the next fruit set is to stabilize watering, mulch the root zone, ease off aggressive nitrogen, and stop chasing quick-fix sprays before you correct the real cause.
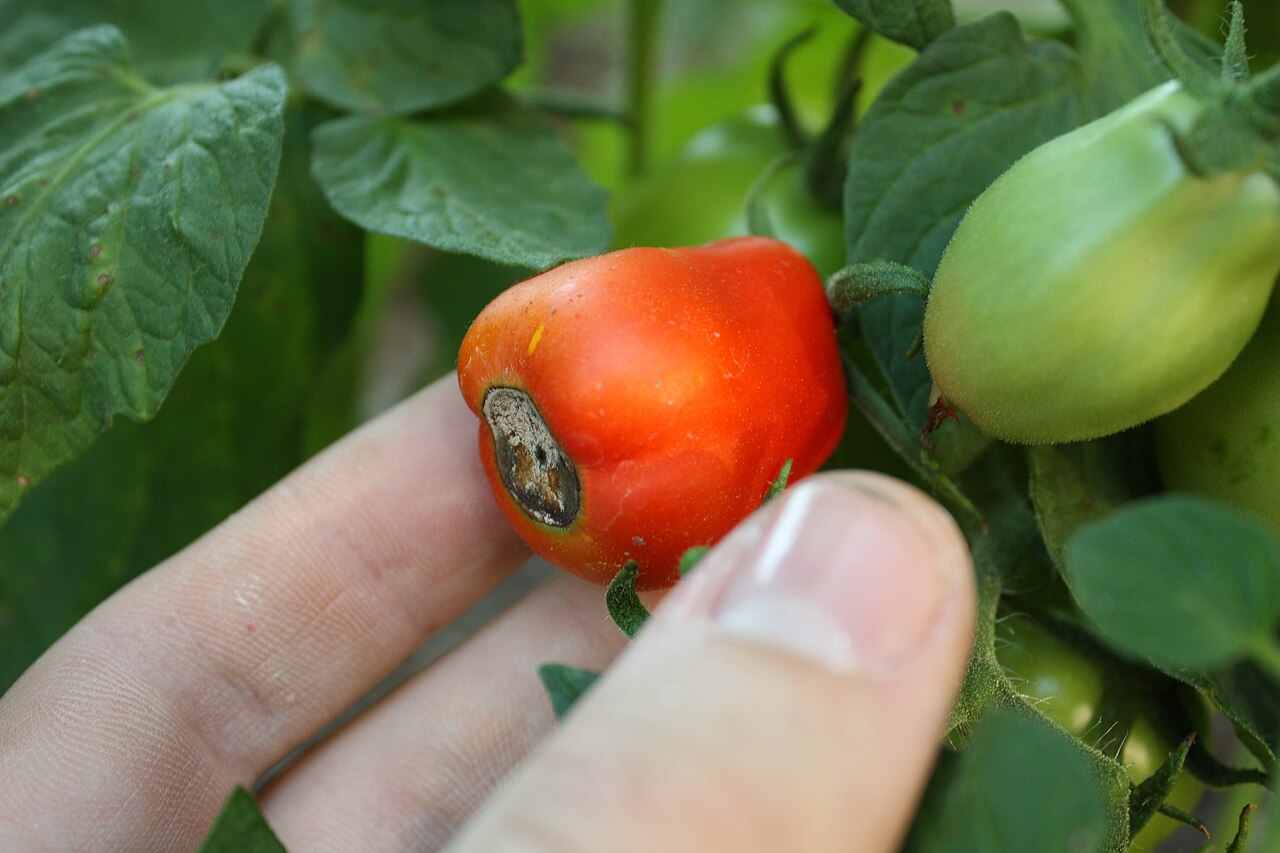
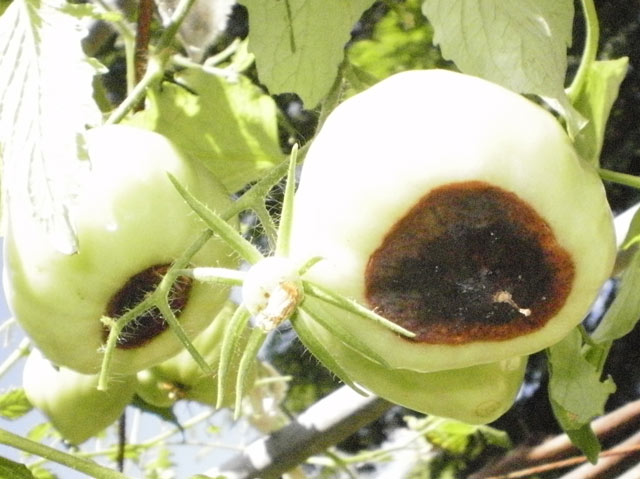
Tomato blossom end rot shows up first as a water-soaked patch on the blossom end of green fruit, then turns dark, leathery, and sunken as calcium deficiency in the fruit tissue catches up with fast growth. If you already follow our guides on how to grow tomatoes from seed, how to grow tomatoes in pots, and when to transplant tomatoes, this page covers the next common failure point: why otherwise healthy plants suddenly start producing tomatoes with a brown bottom and what to change before the next cluster sets fruit.
The practical win is that blossom end rot treatment is mostly a systems problem, not a rescue-product problem. Once fruit tissue collapses, that tomato will not heal. But the plant often produces clean later fruit if you correct watering consistency, protect roots, and stop creating nutrient competition that blocks calcium movement during the highest-growth weeks.
What Causes Tomato Blossom End Rot?
Tomato blossom end rot happens when developing fruit does not receive enough calcium during rapid cell expansion, but that does not automatically mean the soil is empty of calcium. Utah State University IPM, University of Maryland Extension, and UConn Extension all point to the same underlying pattern: calcium moves with water, so anything that interrupts steady water flow to the fruit can trigger the disorder even when the bed tests reasonably fertile.
That distinction matters because it changes the fix. Gardeners often assume blossom end rot tomatoes need more calcium on the leaves immediately. In reality, fluctuating soil moisture, stressed roots, excess ammonium nitrogen, high salts, or overwatering in heavy soil can all slow calcium delivery at the exact time fruit is enlarging fastest. Treating it as a contagious disease leads to the wrong tools and the wrong timing.
| Driver | What It Does to the Plant | What You Usually Notice | Best Correction |
|---|---|---|---|
| Dry-wet swings in soil moisture | Interrupts steady calcium movement to expanding fruit | First flush fruit blackens after heat or skipped watering | Use deep, regular irrigation and mulch |
| Too much fast nitrogen | Pushes lush top growth faster than fruit calcium delivery | Huge green plants, soft growth, BER on early clusters | Back off ammonium-heavy feeding |
| Root injury or cramped containers | Reduces root area available to pull water and nutrients | Plants wilt quickly and fruit problems show up fast | Protect roots, size containers up, avoid cultivation damage |
| Salty media or fertilizer buildup | Competes with calcium uptake and stresses roots | Leaf-edge burn plus BER in pots or beds | Flush salts where appropriate and simplify feeding |
| Waterlogged heavy soil | Limits root function and oxygen | BER plus slow growth and yellowing | Improve drainage and stop shallow frequent watering |
This is why blossom end rot treatment is partly about what you stop doing. More products do not automatically mean more calcium reaches the fruit. A stable root zone matters more than a crowded shelf of sprays.
How Do You Confirm It Is Blossom End Rot and Not a Disease or Pest Issue?
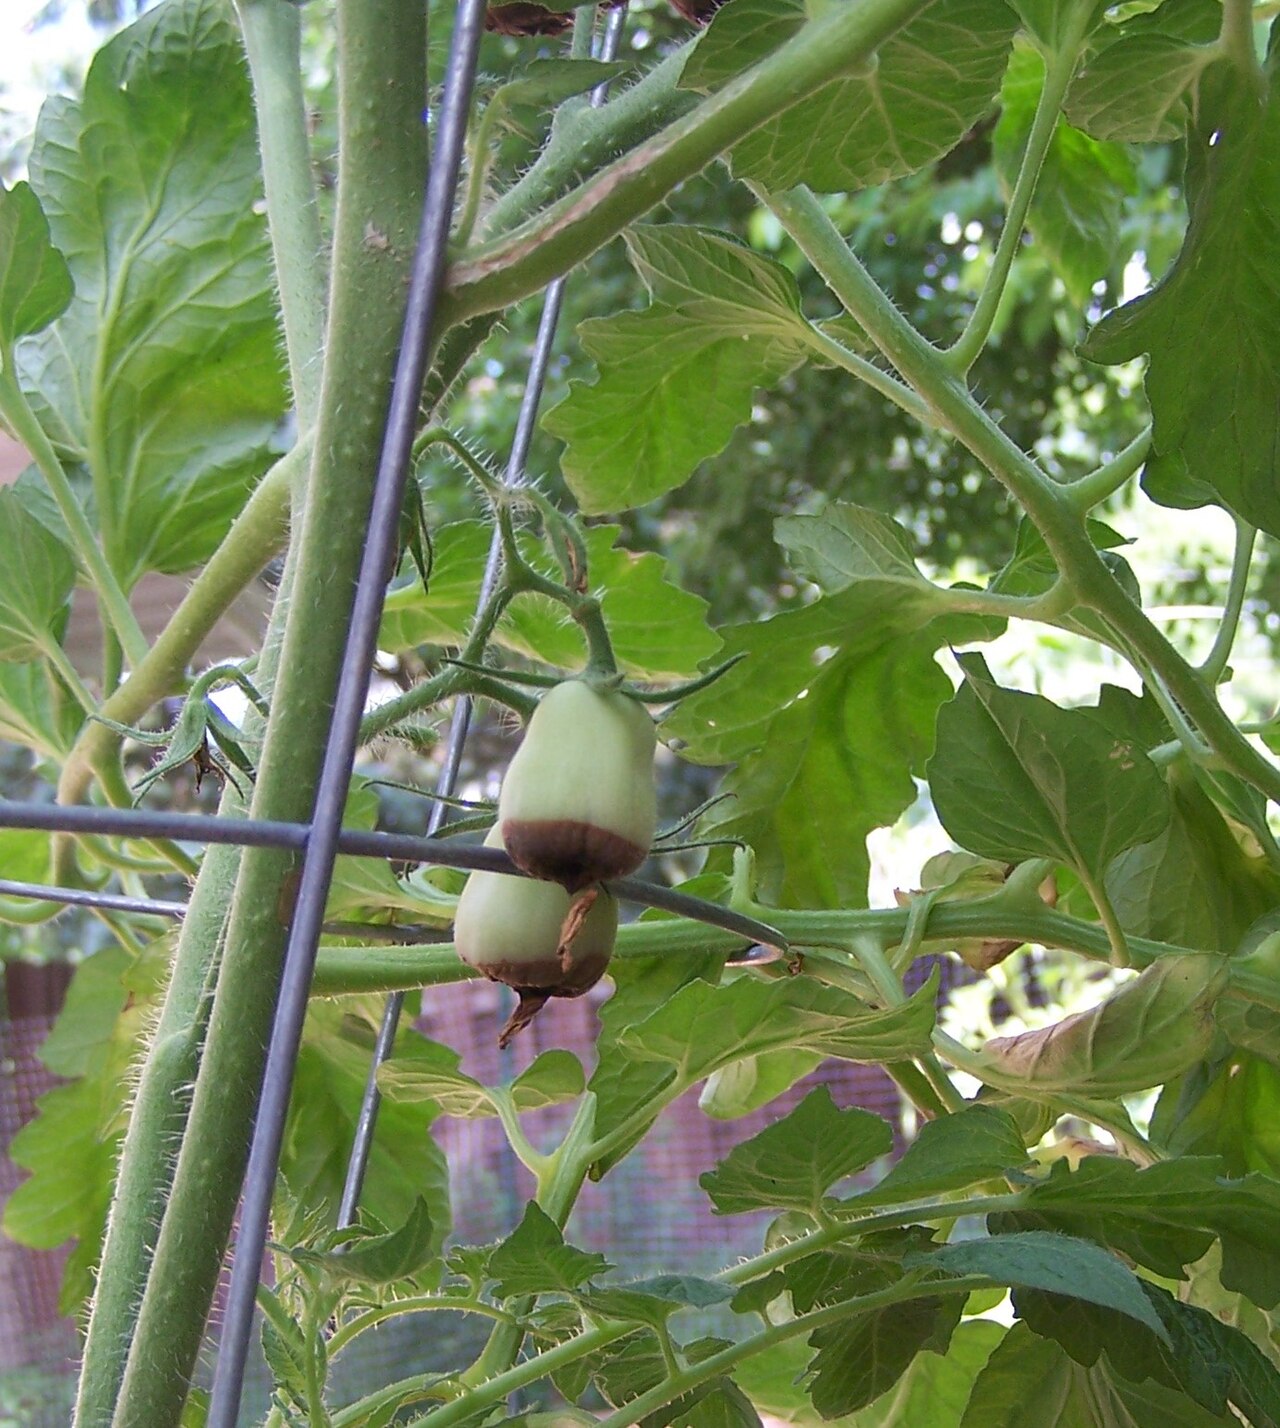
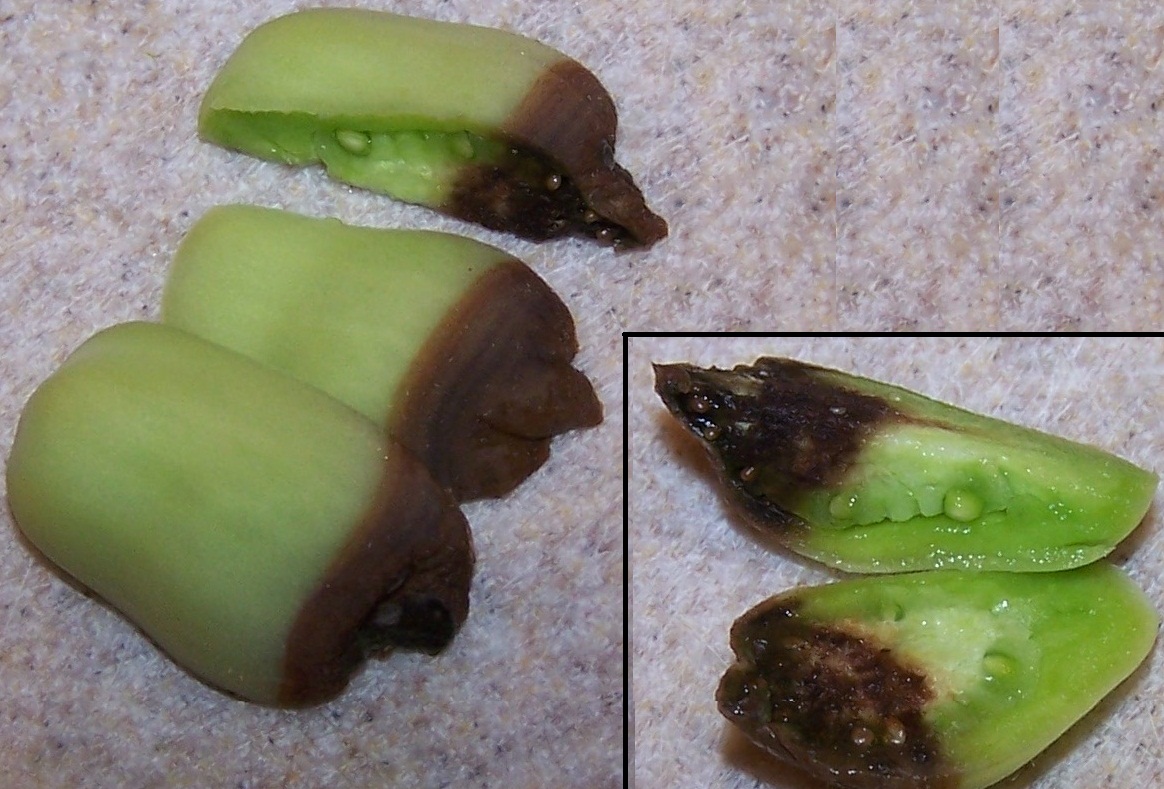
Blossom end rot has a specific symptom pattern. Extension guidance describes a pale, water-soaked spot at the blossom end that enlarges, darkens, and becomes leathery or sunken. The plant can still look vigorous while the fruit fails, which is why the disorder surprises gardeners who expect foliage problems first. Unlike foliar disease, the lesion begins on the fruit bottom, not as random spotting across leaves and stems.
Maryland notes that large plum and paste tomatoes are hit more often than cherry types, and the first or second flush of fruit is usually the most vulnerable. That fits real backyard patterns: fast-growing Roma, San Marzano, and elongated sauce varieties often show blossom end rot before cherries or salad tomatoes in the same bed. If you are growing in containers, the problem can appear even faster because potting mix dries and reheats much more quickly than in-ground soil.
| Problem | Where It Starts | Texture | Main Clue |
|---|---|---|---|
| Blossom end rot | Blossom end of green fruit | Water-soaked first, then leathery and sunken | Often follows moisture swings or early heavy fruit set |
| Sunscald | Side or shoulder exposed to direct sun | Papery, bleached, then tough | Shows up after leaf loss or over-pruning |
| Anthracnose or fruit rot | Can begin on ripe fruit or wounds | Softer, often with spore masses or spreading decay | Usually worse as fruit ripens, not just on green fruit |
| Chewing damage | Irregular anywhere on fruit | Torn or gouged | Look for pests, frass, or holes with ragged edges |
The practical test is simple: if the damage is concentrated on the blossom end of young fruit, the tissue is dark and sunken rather than chewed, and your recent watering has been inconsistent, tomato rot on the bottom is far more likely to be blossom end rot than a spreading infection. That is useful because you can move straight to water and root management instead of spraying fungicide blindly.
What Should You Do Today if Your Plant Already Has Blossom End Rot?
Start with triage, not panic. The affected fruit will not heal, so remove fruit that is clearly collapsing or heading toward secondary decay. Maryland advises removing affected fruit where symptoms appear, and UConn makes the same broader point in practical terms: once the tissue has broken down, your goal is to protect new fruit, not save the damaged one. Removing the worst fruit also helps you track whether the next cluster is improving after you correct moisture management.
Then audit the root zone. Press a finger into the soil or potting mix several inches deep, not just at the surface. If the root zone is bone dry, correct that with a full soaking that wets the entire profile. If the soil is already saturated and sour, watering more will not fix calcium deficiency tomatoes; it will extend root stress. The right move is to get back to an even-moisture pattern and stop the swing between drought and flood.
Same-day recovery checklist
- Remove fruit with advanced black, sunken lesions so you can monitor fresh set clearly.
- Check the actual root zone, not just the top half-inch of dry mulch or potting mix.
- Mulch immediately if bare soil is exposed and temperatures are climbing.
- Pause fast-release nitrogen feeding until fruit set stabilizes.
- Inspect containers for root binding, undersized volume, or hot wind exposure.
Important: blossom end rot is not contagious. One damaged fruit does not mean the entire plant is ruined, and a bad first cluster does not guarantee a bad second cluster if you correct the underlying water-delivery problem quickly.
If your tomatoes are in containers, compare your current setup to the soil-volume and watering guidance in how to grow tomatoes in pots. Small pots, dark containers in full sun, and crowded roots all increase the odds of blossom end rot in containers because they make the moisture curve much steeper.
How Often Should You Water Tomatoes to Prevent Blossom End Rot?
The correct answer is not "every day" or "once a week" in isolation. The correct answer is to keep the full root zone evenly moist without creating repeated drought stress or prolonged saturation. Maryland says a mature in-ground tomato plant may need roughly 2 to 3 gallons of water weekly, but that is a baseline, not a fixed rule, because temperature, wind, soil texture, and mulch depth change how long that water stays available.
Uniformity beats frequency. A deep soak followed by enough time for oxygen to return to the root zone is better than shallow splashes that wet the surface and leave deeper roots dry. Drip irrigation versus soaker hose decisions matter here because systems that wet evenly and predictably reduce the violent moisture swings that trigger BER. Mulch matters just as much. USU recommends 2 to 3 inches of organic mulch to cool soil and cut water loss, which is one of the few fast interventions that helps almost immediately.
| Growing Setup | What to Watch | Best Pattern | Common Mistake |
|---|---|---|---|
| In-ground loam | Dryness 3 to 4 inches down | Deep soak when the root zone begins drying | Light daily surface watering |
| Raised bed | Fast drying at bed edges and corners | Even drip coverage plus mulch | Watering only the center row |
| Fabric grow bag | Rapid drying in heat and wind | Check at least once or twice daily in hot spells | Assuming yesterday's watering still holds |
| Large patio pot | Heat buildup on walls and root crowding | Water until the full profile is wet, then monitor closely | Alternating full drought with emergency flooding |
If heat and evaporation are part of the pattern, use the same moisture-control logic we outline in mulch and evaporation control in vegetable beds. Blossom end rot prevention is often just the visible payoff of getting the watering system stable enough that roots never have to guess what day it is.
Do Calcium Sprays, Gypsum, Eggshells, or Epsom Salt Actually Help?
This is the section where most blossom end rot treatment advice gets sloppy. Calcium sprays may offer limited temporary relief in some programs, and both Maryland and Oregon State note calcium chloride sprays as a possible option after symptoms are detected. But even the extension guidance that allows them does not frame them as the first lever. UConn is explicit that sprays will not help fruit already damaged, and USU says foliar sprays are generally not recommended in Utah because steady uptake through the root zone matters more than trying to patch the symptom after the fact.
Gypsum is different. If a soil test shows calcium is genuinely short and pH does not need to rise, gypsum can provide calcium without the pH shift you would get from lime. That is why Maryland pairs calcium additions with a soil-test-first approach and pH guidance in the 6.3 to 6.8 range. Eggshell folklore, by contrast, is usually too slow to matter during the current tomato cycle. They do not become fast-available calcium just because they are dropped into a planting hole.
Epsom salt is the bigger trap. Gardeners reach for it because the symptom looks nutritional, but magnesium additions do not correct a calcium delivery problem and can increase nutrient competition when used blindly. USU specifically lists excessive magnesium, potassium, and ammonium among factors that can interfere with calcium uptake. If you have not confirmed a magnesium deficiency separately, Epsom salt is usually a side trip rather than a solution.
| Remedy | When It Helps | What It Cannot Do | Use or Skip? |
|---|---|---|---|
| Consistent irrigation | Almost always, if moisture swings are the trigger | Cannot repair damaged fruit | Use first |
| Mulch | When evaporation and heat are driving root-zone swings | Cannot fix severe nutrient imbalance alone | Use first |
| Soil test plus gypsum or lime | When actual calcium or pH issues are confirmed | Too slow to heal current lesions | Use selectively |
| Calcium chloride spray | Possible limited support for future fruit after basics are corrected | Will not fix existing blackened tissue | Secondary tool |
| Eggshells | Long-term compost ingredient at best | Not fast enough for current crop rescue | Skip as a quick fix |
| Epsom salt | Only if a true magnesium deficiency is confirmed | Does not solve blossom end rot by itself | Usually skip |
So the decision framework is simple: fix water first, test soil second, amend only if the test supports it, and treat calcium sprays as a backup tactic rather than the core plan. That sequence prevents a lot of wasted effort.
Why Are Paste Tomatoes, Containers, and Early Fruit Sets More Vulnerable?
Blossom end rot is common on the first flush because the plant is still balancing root expansion, canopy growth, and fruit demand at the same time. When growth is aggressive, the fruit can lose the competition for calcium delivery. Paste and elongated sauce tomatoes are more susceptible partly because fruit shape and growth pattern make them less forgiving during that early stretch. Maryland specifically notes that symptoms are rarely seen in cherry tomatoes and are most common in plum or paste cultivars.
Containers intensify every stressor in the system. The root volume is capped, the media warms faster, soluble fertilizer levels concentrate more easily, and wind can strip moisture out in a single sunny afternoon. That is why gardeners often report blossom end rot in containers even when nearby in-ground plants look fine. The issue is not that containers are bad. It is that they demand tighter control of water, media temperature, and feed strength.
A tomato plant can be "healthy" in the leaf canopy and still fail fruit if the root-zone moisture curve is too jagged for calcium to move reliably into the enlarging fruit.
For seed-started plants, early transplant timing also matters. Plants moved outside too early into cold, erratic soil can stall root function before the first fruit cluster sets. That is one reason our harden off seedlings plan and seed starting calendar by zone emphasize transition timing rather than just transplant date. Stable roots now prevent fruit disorders later.
What Is the Best 7-Day Prevention Plan for the Next Cluster of Fruit?
Most gardeners do not need a season-long overhaul to stop blossom end rot. They need one week of consistent decisions. The point of this plan is to flatten the moisture curve, reduce nutrient competition, and make it easier to see whether the next fruit set is already cleaner.
Day 1: Reset moisture and remove the worst fruit
Water deeply if the root zone is genuinely dry, or let saturated soil begin drying toward normal if overwatering has been the pattern. Remove obviously damaged fruit so new symptoms are easy to track. Add mulch if the bed or container is still bare.
Day 2 to 3: Stabilize irrigation delivery
Inspect emitters, saucers, and drainage. If you are hand-watering, switch to a repeatable morning check rather than watering reactively at random. If your setup is inefficient, use the audit steps in how to audit a home irrigation system each spring as a troubleshooting template.
Day 4 to 5: Correct fertilizer pressure
Skip additional high-nitrogen feeding if plants are already dark green and vigorous. If you fertilized heavily, water enough to normalize the root zone but do not keep the soil soggy. In containers, consider whether feed concentration is stronger than the plant size really needs.
Day 6 to 7: Watch new fruit, not old damage
Inspect the newest marble-sized fruit. If the new set is clean, your correction is already working even if older fruit still shows black spots. If the new set is still failing after moisture is stable, a soil test and pH review become the next logical step.
| What You See | Likely Issue | Best Next Move |
|---|---|---|
| One bad early cluster, cleaner new fruit | Temporary moisture or root stress | Stay consistent and avoid changing five things at once |
| BER continuing on every new cluster | Moisture is still unstable or calcium availability is low | Run a soil test and review irrigation delivery |
| BER mostly in pots, not in beds | Container volume and heat are the main pressure | Shade pots lightly, mulch, and increase monitoring frequency |
| Huge lush vines with BER after heavy feeding | Growth push is outpacing calcium transport | Pause fast nitrogen and let fruiting catch up |
This is also the right moment to simplify your troubleshooting. If you change watering, fertilizer, foliar sprays, pruning, and container placement all in the same two days, you will not know what actually fixed the problem.
FAQ: Tomato Blossom End Rot
What causes tomato blossom end rot?
Tomato blossom end rot happens when developing fruit does not receive enough calcium at the moment cells are expanding, and that shortfall is usually triggered by uneven water movement rather than empty soil. Extension guidance consistently points to moisture swings, root stress, excess ammonium nitrogen, and salty growing media as the biggest drivers. That is why the disorder can show up on otherwise vigorous plants.
Can tomatoes recover from blossom end rot?
The damaged fruit will not heal, because the tissue at the blossom end has already collapsed. The plant can still produce normal later fruit if you steady irrigation, keep roots active, and stop forcing soft growth with aggressive fertilizer. Many gardeners only lose the first cluster or two once the root zone stabilizes.
Does calcium spray fix blossom end rot?
Calcium sprays may offer limited temporary relief in some programs, but they do not repair fruit that is already blackening and they do not solve the underlying water-management problem. Treat them as a secondary tool only after you fix moisture consistency and confirm calcium availability with a soil test. They are not a substitute for better irrigation control.
How often should you water tomatoes to prevent blossom end rot?
The right schedule is not a fixed daily rule but a consistency rule: keep the full root zone evenly moist without cycling between drought and saturation. University of Maryland Extension notes that a mature in-ground tomato may need roughly 2 to 3 gallons of water per week, while containers usually need more frequent checks because they dry faster. In hot, windy weather, monitoring matters more than calendar spacing.
Can you eat tomatoes with blossom end rot?
Yes, if the unaffected portion is still firm and sound, you can cut away the damaged section. Discard fruit that has turned soft, moldy, or watery because secondary organisms may have moved into the lesion. Quality is usually lower, so many gardeners simply remove affected fruit and focus on the next cluster.