How to Build a Wicking Bed That Waters Vegetables From Below
How to build a wicking bed starts with a lined lower reservoir, a correctly placed overflow, and a soil profile that can pull water upward without smothering roots. The build succeeds or fails on system balance: reservoir depth, air gap, and soil mix have to work together or the bed turns either dry at the surface or saturated at the root crown.
How to build a wicking bed is a design question before it is a carpentry question, because a self-watering raised bed only works when capillary action can move moisture consistently from stored water into the active root zone. If the reservoir is too shallow, refill intervals get annoying; if the overflow sits too high, the lower profile stays soggy; and if the mix is too dense, the bed behaves like a bathtub instead of a low water vegetable garden. A durable build solves those three variables up front so irrigation becomes predictable instead of reactive.
That is why gardeners treat a wicking bed as a type of sub-irrigated planter rather than a normal raised bed with extra plumbing. University of Kentucky Extension describes the system as a self-contained bed with a built-in reservoir that lets plants regulate their own water access, while Mississippi State Extension notes that success depends on both the water storage layer and a growing medium that wicks well. In other words, the container, the fill, and the overflow are one irrigation system, not separate parts.
What Is a Wicking Bed and How Does It Work?
A wicking bed is a raised bed with four functional layers: a waterproof liner, a water reservoir, a wicking bridge that connects water to the soil above, and a planted growing mix. Water enters through a fill pipe, collects below the soil surface, and rises upward through capillary action instead of being applied repeatedly from above. The goal is not hydroponics or permanent saturation. The goal is a stable moisture band that roots can tap into between refills.
That lower reservoir is what separates a wicking bed from a standard raised bed with mulch. In a regular bed, moisture tends to enter from the top and then drain downward, which creates repeated wet-dry swings near the surface. In a wicking bed, the reservoir buffers those swings. The upper few inches can still dry somewhat between waterings, which is useful for disease management and weed suppression, but the root zone below stays more even. That is why fruiting crops often show steadier growth in hot weather once the system is dialed in.
Mississippi State's extension profile on a permanent subirrigated planter explains the principle clearly: water is maintained at a controlled depth, excess rain leaves through a depth-control outlet, and the media above has to wick efficiently while still allowing aeration. That last point matters. A wicking bed is not designed to keep the entire profile fully wet. It is designed to keep water available while preserving oxygen in the root zone.
| Part | Job | If It Is Wrong | Result in the Garden |
|---|---|---|---|
| Liner | Holds the water reservoir inside the bed | Leaks or punctures | Frequent refills and uneven moisture |
| Reservoir layer | Stores water below the soil profile | Too shallow or too deep | Either constant refilling or poor aeration |
| Overflow outlet | Sets the maximum water level | Too high or missing | Waterlogged mix after heavy rain |
| Wicking bridge | Moves water upward into the soil | Weak contact with growing mix | Dry upper root zone despite full reservoir |
| Soil blend | Balances capillary rise and air space | Too mineral-heavy or too fluffy | Patchy moisture and weak root development |
If you are choosing between irrigation systems for a food bed, compare this design with the strengths and limits in our guide to drip irrigation versus soaker hose water efficiency. A wicking bed usually wins where refill convenience matters most, while drip still scales better for long in-ground rows.
When Does a Self-Watering Raised Bed Make More Sense Than Surface Irrigation?
The strongest use case is inconsistent availability. If you travel for a long weekend, work long outdoor shifts, or simply miss a day when temperatures spike, a wicking bed buys time. A mulched conventional bed can still wilt fast when shallow roots lose access to top moisture. A reservoir-fed bed slows that decline by storing water where evaporation is lower and wind has less effect.
The second use case is difficult siting. Deck gardens, paved courtyards, and compact backyards often lack an easy place to run drip lines or leave little margin for runoff. A lined reservoir keeps water inside the bed and makes refill volume easier to estimate. Mississippi State's case study on permanent subirrigated beds highlighted reduced runoff and less wetting of foliage, which can help lower splash-driven disease pressure on crops such as tomatoes.
There are tradeoffs. A wicking bed costs more to build than a standard raised bed, it demands more careful media selection, and it can create salt accumulation near the surface if you never flush the profile from above. The benefit is most compelling when water efficiency and labor reduction matter enough to justify that added setup discipline. For gardeners who already run a tuned controller and can inspect their beds daily, the incremental gain is smaller.
A simple decision filter works well here. Build a wicking bed when you need reservoir buffering, when you garden in containers or isolated raised beds, or when you want a raised bed irrigation alternative that reduces frequent top watering. Stay with conventional beds plus mulch and drip if you need easier crop rotation across many beds, broader automation, or lower first cost.
How Deep Should a Wicking Bed Reservoir Be?
Most home builds work best with a reservoir depth around 4 to 8 inches, not because deeper is impossible, but because that range is easier to manage with common materials and keeps the balance between storage and aeration reasonable. A deeper reservoir does extend the time between refills, yet it also raises the stakes on overflow height and structural support. Once you start storing more water in a deeper cavity, small errors in outlet placement can keep the lower root zone saturated for too long.
Think of the overflow as the governor of the whole system. The overflow should be set so the reservoir can fill, but an air space remains above the standing water and below the main root mass. Mississippi State's planter diagram shows this clearly: the outlet is not just a drainage pipe for storms. It is the feature that prevents the reservoir from behaving like a pond pressed directly against the growing mix.
Reservoir depth by crop demand and management style
| Reservoir Depth | Best For | Main Benefit | Main Risk |
|---|---|---|---|
| 4-5 inches | Leafy greens, herbs, cool-season mixes | Fast response and easy oxygen management | More frequent summer refills |
| 6 inches | Mixed vegetable beds | Balanced storage and aeration | Requires accurate overflow placement |
| 7-8 inches | Tomatoes, cucumbers, peppers in hot climates | Longer refill interval | Higher risk if media or overflow are wrong |
Do not chase reservoir depth until you have resolved bed width, crop plan, and refill access. A narrow bed with a deep reservoir can still perform poorly if the soil bridge is discontinuous or if the fill point is awkward to use. For most homeowners, a moderate-depth reservoir with easy inspection beats an oversized water chamber that is harder to troubleshoot.
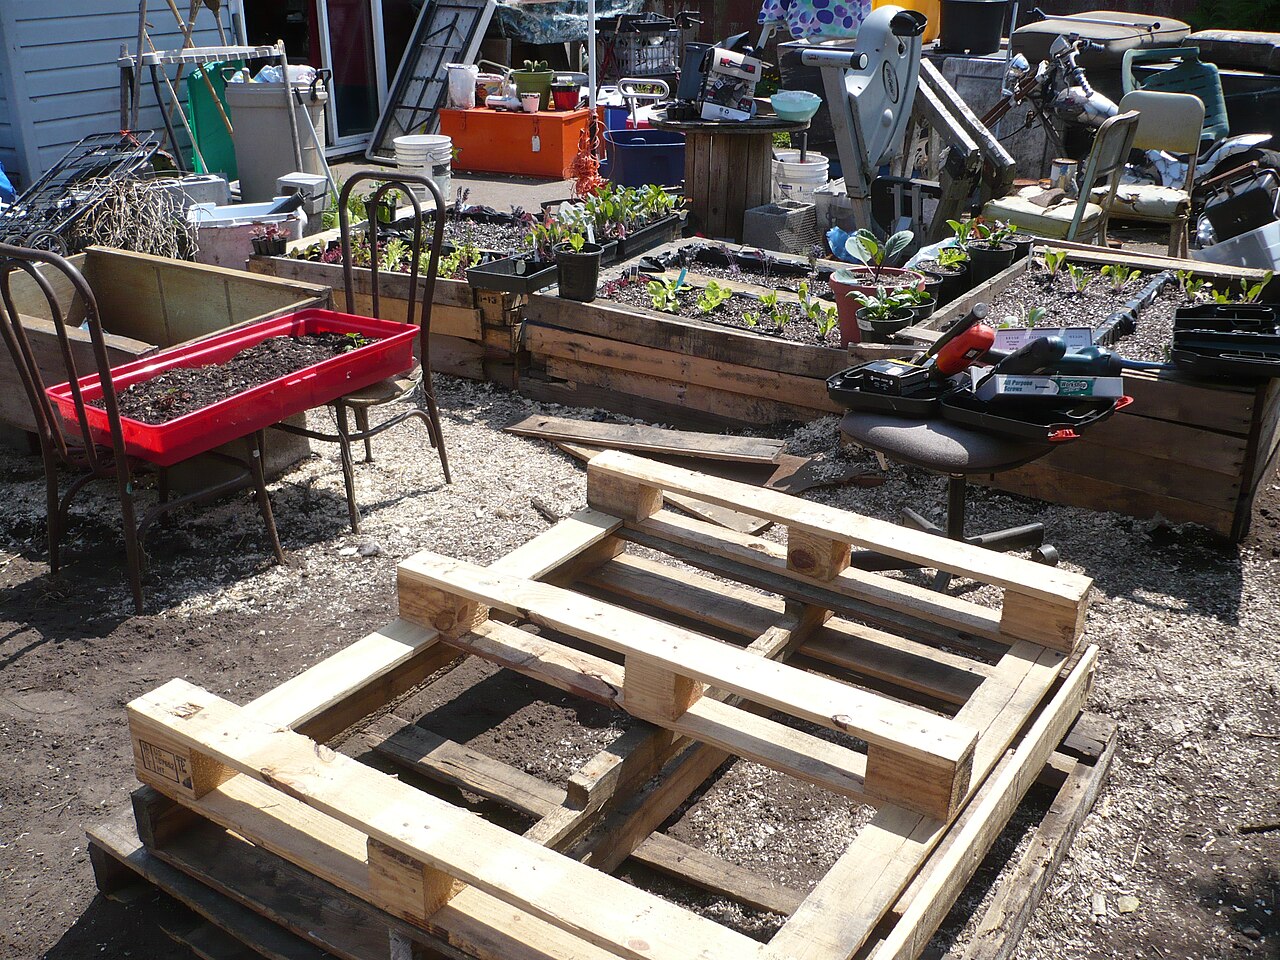
What Materials and Dimensions Do You Need Before You Start Building?
The frame can be timber, masonry block, metal trough, or another rigid raised-bed shell, but the irrigation logic stays the same. You need a structure strong enough to hold wet media, a liner that can survive contact with edges, a reservoir medium or support matrix, a vertical fill pipe, and an overflow pipe fixed at the final water level. Many DIY builds use perforated drain pipe, washed stone, recycled containers, or corrugated pipe to create reservoir void space. The exact material matters less than keeping the void stable and leaving reliable contact points where moisture can rise into the mix.
Bed width is usually more limiting than bed length. A width around 3 to 4 feet keeps harvest and maintenance comfortable while still allowing a meaningful reservoir footprint. Standard raised-bed planning rules still apply here, so if you need a refresher on frame sizing and fill logistics, use our guide on how to fill a raised garden bed before you finalize your material list.
Basic build checklist
- A raised-bed shell with enough strength for saturated soil weight
- Food-safe pond liner or comparable waterproof liner
- Reservoir support material such as perforated pipe, modular void crates, or washed aggregate
- A vertical fill pipe wide enough to accept a hose or watering can
- An overflow pipe set at the maximum safe water line
- Geotextile or separation layer if your chosen design needs to keep media out of the reservoir void
- A wicking-capable growing mix with compost plus coarse, airy components
- Mulch and crop supports for the first planting cycle
Before cutting anything, decide where the overflow will discharge. That outlet has to empty safely onto gravel, lawn, or another controlled surface rather than splash soil out of the bed wall. If the site already gets runoff from hardscape, pair the bed with the water-control checks in our guide to auditing a home irrigation system each spring so you do not solve one watering problem while creating another.
How to Build a Wicking Bed Step by Step
A reliable build sequence prevents the two most common DIY failures: puncturing the liner after installation and setting the overflow before the reservoir geometry is finalized. Work in this order so every later step confirms the one before it.
1. Build and level the shell
Assemble the bed on a stable base and check level in both directions. A wicking bed depends on a consistent water plane, so a frame that leans even modestly can create one chronically wet end and one dry end. Correct the frame first, because you cannot tune around a crooked water line later.
2. Install liner protection and the liner
Smooth protruding screw points, cover sharp corners, and add any protective underlayment you are using. Then install the liner with enough slack for corners and weight. Do not stretch it tight. A little slack reduces the chance of tearing once water and soil load settle.
3. Build the reservoir void and place the fill pipe
Set the reservoir material in the base and anchor the fill pipe so it reaches the bottom cleanly. If you use perforated pipe or another chambered void, make sure the system cannot shift when the bed is filled. The fill point should be easy to access from the outside without stepping into planting space.
4. Drill and fix the overflow
Mark the overflow at the finished water height, then install and seal it before adding media. This is the moment that determines your water table. Hose-test the empty system until water exits exactly where planned and without undermining the shell.
5. Add the wicking bridge and growing mix
Create strong contact between the reservoir layer and the first lift of media so moisture has a path upward. Then fill the rest of the bed with your final mix in lifts, wetting lightly as needed so it settles without hard compaction. Do not stamp the media down. Compression kills the pore structure that makes the system work.
6. Mulch, plant, and pre-charge the bed
Plant immediately after filling, then water from the top once to settle the profile and eliminate dry pockets. After that first top-down soak, start using the fill tube so the reservoir becomes the primary water source. A thin organic mulch layer on top helps moderate surface drying and supports the low water vegetable garden goal.
At this stage, a quick top-down wetting strategy still matters even in a bottom-watered design. Our guide to mulch and evaporation control in vegetable beds is useful here because mulch depth that is perfect for a conventional bed can be too heavy over a fresh wicking mix. Start moderate, then increase only if the top dries too quickly.

What Soil Mix Works Best in a Wicking Bed?
A wicking bed soil mix has one job that surprises many gardeners: it has to carry water upward and still leave enough oxygen for roots after repeated refill cycles. Standard mineral topsoil is usually too heavy for that role. Many successful designs lean on compost plus soilless components such as peat, coconut coir, perlite, vermiculite, bark fines, or a well-structured commercial raised-bed blend. Kentucky and Mississippi State Extension materials both emphasize that the media must wick well, not merely hold water.
The Mississippi State planter profile is especially useful because it reports a real test mix: 85 percent peat, 10 percent perlite, and 5 percent vermiculite, adjusted with lime based on soil testing. You do not need to copy that formula exactly for a backyard raised bed, but the principle is valuable. A successful mix is usually dominated by moisture-managing organic material with enough coarse fraction to resist collapse and enough nutrients supplied through compost or a planned feeding program.
Target mix characteristics
| Characteristic | Why It Matters | Too Low | Too High |
|---|---|---|---|
| Capillary movement | Moves water from reservoir into the root zone | Dry upper profile | Can also signal a mix that stays too wet |
| Air-filled porosity | Keeps roots oxygenated after refill or rain | Stalled roots and disease pressure | Surface dries too quickly |
| Organic matter stability | Maintains structure over time | Mix shrinks and settles fast | Bed may slump unevenly if uncomposted |
| Nutrient holding capacity | Supports feeding between flushes | Plants yellow quickly | Salt accumulation risk rises if overfertilized |
Do not confuse "wicks well" with "always better when wetter." A blend that stays saturated after rain is not a strong wicking mix. It is simply an oxygen-poor one. If you garden in a humid climate, leave yourself a margin for storm recovery. You can always refill a slightly conservative reservoir; you cannot undo a permanently soggy profile without rebuilding.
How Often Do You Refill a Wicking Bed and Which Crops Fit Best?
Refill frequency depends on canopy size, heat load, wind, and crop type more than on the concept of wicking itself. Mississippi State's featured grower reported adding a couple of gallons every three or four days during active production, which is a useful benchmark for a tuned system rather than a universal rule. Expect leafy greens in mild weather to stretch longer between fills than tomatoes, cucumbers, squash, or basil in hot summer conditions.
Crop choice matters because some plants respond especially well to steady moisture while others prefer sharper dry-back cycles. Tomatoes, peppers, basil, cucumbers, lettuces, and many herbs are good fits when the bed drains correctly. Mediterranean herbs that prefer lean, fast-drying conditions can still work, but they usually belong near the drier bed edge or in a different container system altogether.
Best and weaker fits for a wicking bed
| Crop Group | Fit | Why | Watch For |
|---|---|---|---|
| Tomatoes and peppers | Strong | Benefit from steadier moisture during fruit set | Need regular feeding and support |
| Lettuces and leafy greens | Strong | Shallow roots appreciate moisture consistency | Surface may stay too humid under heavy mulch |
| Cucumbers and basil | Strong | High water demand matches reservoir buffering | Can outgrow small reservoirs quickly |
| Root crops | Moderate | Can work if profile is deep and loose | Misshapen roots in dense media |
| Rosemary, lavender, thyme | Weak to moderate | Prefer drier cycles than many wicking beds provide | Root stress in persistently moist mixes |
If your main crop plan changes throughout the year, use the seasonal timing cues from our seed starting calendar by zone so reservoir demand aligns with the actual crop load you place in the bed. A spring lettuce system and a midsummer tomato system do not consume water the same way, even in the same box.

What Mistakes Cause Most Wicking Bed Failures?
The first failure pattern is treating the system like a sealed water tank with no oxygen budget. When overflow height is too high, roots and microbial life lose the air space they need, and the bed starts acting like a swampy container. The second failure is using heavy garden soil because it is cheap or already on site. That can reduce capillary rise, create dense zones, and make root crops twist or stall.
The third common mistake is overfertilizing in a system that is rarely flushed from above. Research on sub-irrigated container systems has shown that they can improve water use efficiency, but they also require attention to nutrient placement and salt management because the moisture gradient differs from top-watered beds. In practice, that means lighter, more frequent fertility and an occasional top-water flush if crusting or tip burn suggests salts are concentrating near the upper profile.
Maintenance stays simple when the original build is sound. Check the overflow after heavy rain, confirm the fill tube is unobstructed, keep mulch off the stem crown of young plants, and note how quickly the reservoir empties during heat events. Sudden changes in refill frequency usually point to either a leak or a much larger canopy load than the bed was carrying earlier in the season.
First-season maintenance checklist
- Inspect the overflow outlet after major storms and after the first few refills.
- Top-water once in a while if the surface starts crusting or fertilizers accumulate near the top layer.
- Refresh mulch lightly instead of burying the entire surface under a thick, matting layer.
- Track refill interval in hot weather so you notice leaks or crop-demand changes early.
- Pull aggressive roots from the fill pipe area before they block access.
FAQ: How to Build a Wicking Bed
What is a wicking bed and how does it work?
A wicking bed is a self-watering raised bed with a lined water reservoir below the growing mix. Moisture moves upward by capillary action, so roots can draw water from below instead of depending on frequent surface irrigation. The system works best when the soil blend wicks well and an overflow pipe prevents the root zone from staying saturated.
How deep should a wicking bed reservoir be?
Most home builds perform well with a reservoir depth around 4 to 8 inches, paired with an overflow that protects an air gap above the stored water. Shallower reservoirs refill more often, while deeper ones demand more careful overflow placement to avoid keeping the root zone saturated. For mixed vegetable beds, a moderate middle-ground depth is usually the most forgiving.
What soil mix works best in a wicking bed?
A wicking bed soil mix works best when it combines compost with coarse, soilless components that wick moisture upward while preserving air space. Dense mineral-heavy blends can stall capillary rise, while ultra-light mixes dry too fast near the surface. Build for even moisture movement, not maximum water retention alone.
How often do you refill a wicking bed?
Most gardeners check refill needs every few days in peak summer, but the actual schedule depends on crop demand, canopy size, wind, and reservoir volume. The better metric is observing moisture stability and overflow behavior instead of following a fixed calendar. Hot-weather tomatoes will empty a reservoir much faster than spring greens.
Can you use a wicking bed for tomatoes?
Yes, tomatoes usually perform well in a wicking bed when the soil profile drains cleanly, stakes or trellises are installed early, and nutrition is managed through the season. Fruiting crops still need feeding discipline because stable water does not replace nutrient supply. Keep the lower profile oxygenated and the upper surface mulched, not soggy.