How to Build a Rain Garden That Drains Reliably in Home Landscapes
How to build a rain garden starts with three decisions: where runoff enters, how quickly the soil infiltrates, and where overflow exits during heavy storms. Homeowners get the best long-term results by sizing the basin to roof runoff volume and planting by moisture zone rather than treating the entire bed as one condition.
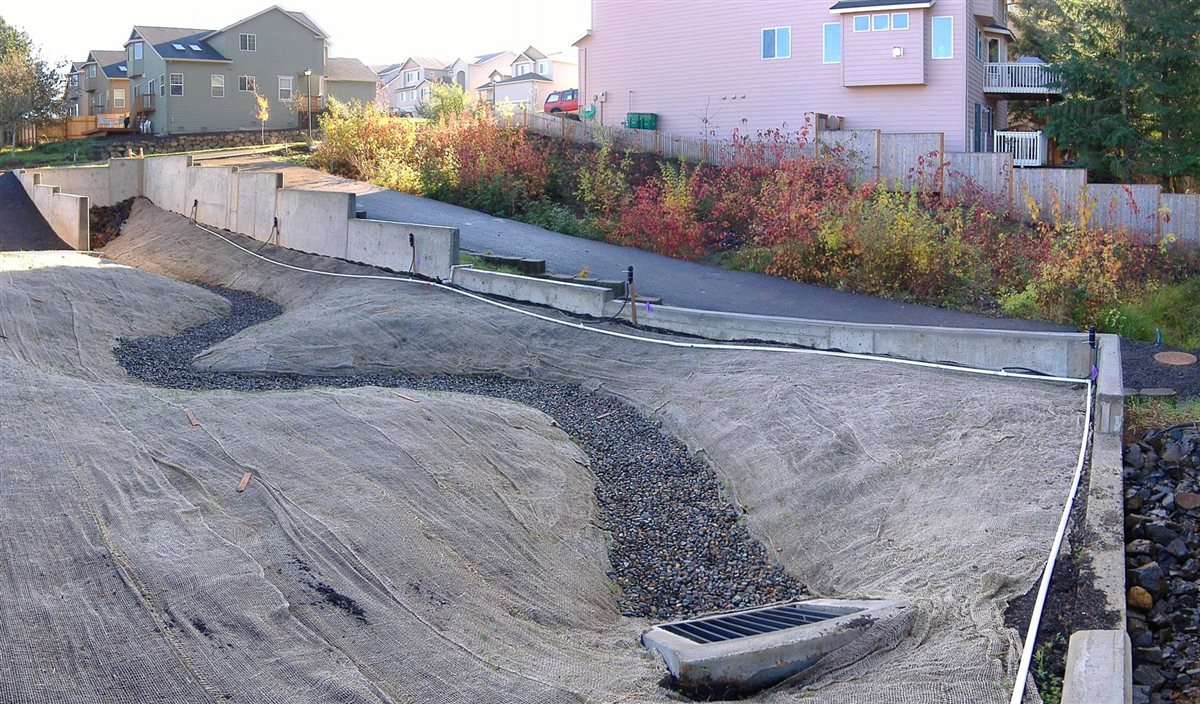
How to build a rain garden is a practical stormwater project that can cut runoff from roofs and paved areas while improving planting space, pollinator value, and curb appeal. The core design work is straightforward if you combine a site setback check, an infiltration test for rain garden sizing, and a graded overflow route that protects your foundation. This guide gives you a full construction workflow with sizing math, rain garden depth rules, and plant-zone planning so the basin drains within the recommended 24 to 48 hour window after storms.
Many failed installations come from one assumption: if the basin is deep enough, water will disappear. In practice, successful residential stormwater runoff control depends more on footprint area and soil infiltration than excavation depth. A shallow, correctly sized basin usually outperforms a deep basin in slow soils because side-slope area and root density do more long-term infiltration work than a compacted hole.

Why Does Rain Garden Design Matter More Than Basin Depth?
A rain garden works as a small infiltration system, not as a permanent pond. During a storm, inflow enters through a downspout extension, swale, or curb cut and temporarily pools in a shallow depression. After the storm, water should move downward through amended topsoil and root channels while extra volume exits through a stable overflow path. If any one of those three paths is missing, the garden either erodes, remains soggy, or bypasses water into structures and walkways.
The performance target most guidance uses is drainage within roughly 24 to 48 hours. Draining faster than that is fine and usually indicates a conservative design. Draining much slower than that can stress plant roots, increase mosquito habitat risk, and signal a sizing mismatch for your soil profile. This is why engineers and extension programs treat infiltration testing and footprint sizing as the first design tasks, not optional extras.
| Function | Design Feature | If Missing | Practical Outcome |
|---|---|---|---|
| Capture | Defined inflow point and splash control | Erosion at entry | Mulch and soil washout after each storm |
| Store | Level basin with 4-8 inch ponding depth | Uneven ponding | Water bypasses usable planting area |
| Infiltrate | Measured soil rate and right footprint size | Undersized bed | Standing water beyond 48 hours |
| Overflow | Armor and safe discharge route | No planned exit | Water moves toward home or hardscape |
If runoff from vegetable beds is your main concern, pair this layout with a spring irrigation audit workflow so rain capture and irrigation scheduling work together instead of overwatering the same zone.
Where Should You Not Put a Rain Garden?
The fastest way to avoid expensive rework is to screen the site before digging. Keep your basin away from foundations, septic components, and utility corridors. Most homeowner guidance recommends a minimum separation of about 10 feet from building foundations, with greater setbacks when grades direct water toward structures. If your property has a known septic field or shallow utility runs, mark those boundaries first and shift the project footprint before you start grading.
Use slope as a pass/fail filter. Gentle slopes are easier to shape into level basins; steeper slopes demand retaining features and more complex overflow control. If your only available area is steep, a long narrow bioswale may be safer than a compact deep basin. You can still achieve runoff reduction, but the geometry has to match terrain.
Fast pre-build checklist
- Setback: Keep basin edges and overflow exits away from foundations and basement walls.
- Utilities: Call utility marking services before excavation in any yard section.
- Inflow source: Confirm what area drains in (roof section, patio, driveway edge).
- Overflow route: Identify where excess water goes in a 2-inch rain event.
- Sun and maintenance access: Verify plant-light needs and clear access for weeding and mulch refresh.
For properties already using rain barrels, review rain garden vs rain barrel site selection to decide when capture-and-release should be combined with infiltration rather than treated as competing options.

How Do You Run an Infiltration Test for Rain Garden Sizing?
An infiltration test for rain garden planning can be done with basic tools: a shovel, tape measure, and stopwatch. Dig a test hole in the proposed basin area, pre-wet the soil, refill to a known depth, then measure drop over time. The measured drop rate determines whether you should prioritize larger surface area, shallower depth, and in some cases engineered media. Without this test, even an attractive basin can fail hydraulically.
Run at least two tests in different spots if the area is large or visually inconsistent. Fill material, compacted construction zones, and old lawn paths can produce very different results in the same yard. Design to the slower rate to stay conservative.
Practical interpretation bands
| Observed Infiltration | Design Signal | Recommended Adjustment | Risk if Ignored |
|---|---|---|---|
| More than 1 in/hour | Favorable drainage | Standard footprint and 4-6 inch ponding depth | Low hydraulic risk |
| 0.5 to 1 in/hour | Moderate drainage | Increase area and protect inflow from sediment | Intermittent long ponding |
| 0.25 to 0.5 in/hour | Slow drainage | Larger basin, strict grading, careful plant zoning | Frequent saturation stress |
| Less than 0.25 in/hour | Very slow drainage | Re-evaluate site or consider engineered support | Persistent standing water |
If your soils are heavy and prone to crusting, combine this project with soil-cover and evaporation control practices in nearby beds so infiltration gains are not offset by compacted surrounding surfaces.
How Big Should a Rain Garden Be and How Deep Should It Be?
For many homes, a dependable starting rule is basin area equal to roughly 10% to 20% of the impervious area draining to it, adjusted upward as infiltration slows. Example: if one downspout drains 600 square feet of roof, initial rain garden size lands around 60 to 120 square feet before soil-rate adjustment. Slow soils push you toward the high end; fast soils allow smaller footprints.
Rain garden depth is usually shallow. Most residential basins use temporary ponding depths around 4 to 8 inches, with side slopes that can be maintained safely and planted densely. Deep pits can look efficient on paper, but they concentrate saturation and can slump or settle unevenly. A broader shallow shape gives better root distribution and easier maintenance access.
A rain garden is not designed to hold all stormwater forever; it is designed to capture the first high-impact runoff, infiltrate it safely, and pass overflow predictably.
| Input | Value | Sizing Effect | Notes |
|---|---|---|---|
| Roof area to one downspout | 600 sq ft | Base target 60-120 sq ft | 10-20% rule of thumb |
| Infiltration rate | 0.4 in/hour | Choose high end (about 120 sq ft) | Slow soil needs more footprint |
| Ponding depth | 6 inches | Moderate storage layer | Balances storage and maintenance access |
| Overflow elevation | 2 inches below lawn edge | Prevents uncontrolled overtopping | Armor outfall with stone |
What Soil Profile and Plant Zones Work Best in a Rain Garden?
Rain garden planting fails when every species is treated as if moisture is uniform across the basin. In reality, the center receives periodic inundation, side slopes cycle between wet and dry, and top edges may resemble regular ornamental beds. Split the layout into moisture bands and assign plants accordingly. This single change improves survival rates more than buying premium cultivars.
Three-zone planting model
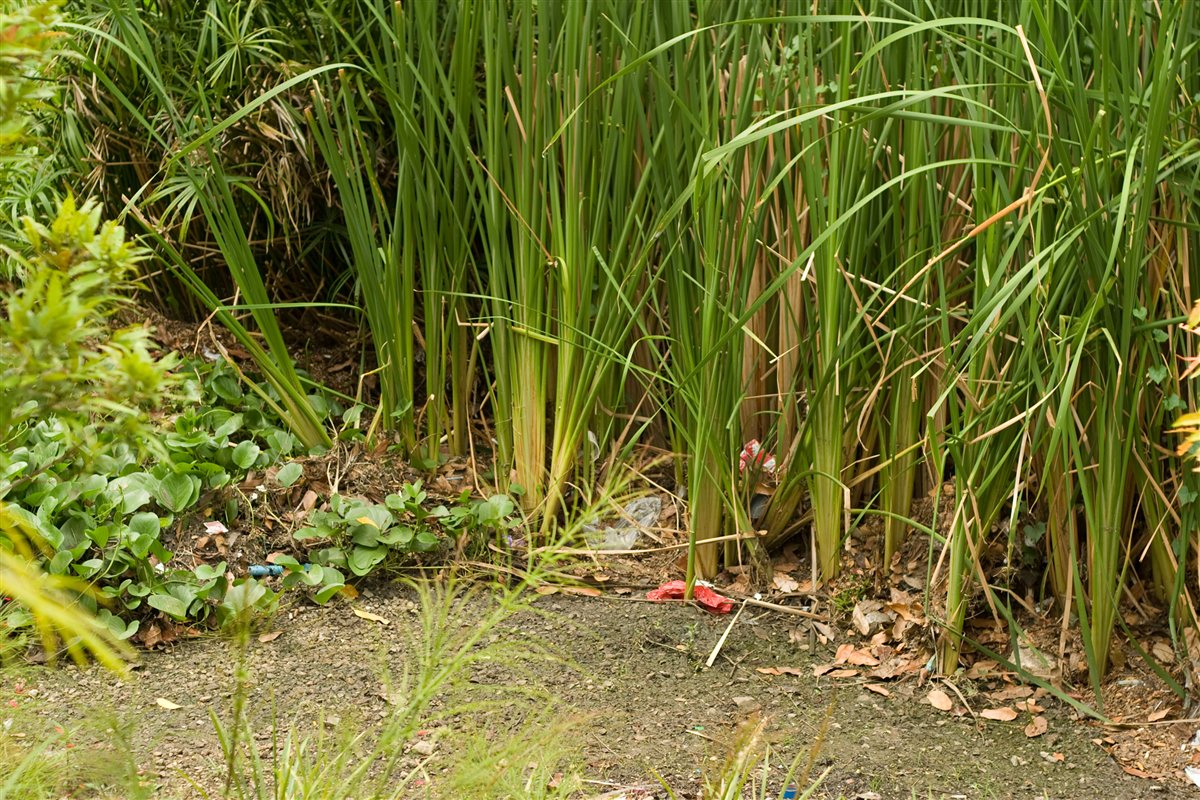
Zone 1 (Basin bottom): Use species that tolerate short-duration saturation and sediment pulses. Dense fibrous roots are helpful for stabilizing the lowest area and encouraging infiltration.
Zone 2 (Side slopes): Choose adaptable species that handle variable moisture because these surfaces cycle rapidly as storms pass and soils dry.
Zone 3 (Upper rim): Use drought-tolerant and deep-rooted species to anchor the perimeter and visually tie the rain garden to nearby beds.
If you build around a food-growing area, coordinate with soil test interpretation before amendments so nutrient additions in adjacent beds do not wash into the basin and trigger excessive weed growth.
| Zone | Hydrology | Plant Traits | Management Priority |
|---|---|---|---|
| Bottom | Wet after storms, dries between events | Flood-tolerant perennials, rushes, sedges | Prevent sediment crusting and bare spots |
| Slope | Alternating wet/dry | Flexible moisture tolerance, dense roots | Stabilize soil and suppress weeds |
| Rim | Mostly drier | Drought-tolerant grasses and flowering perennials | Define edge and reduce mowing intrusion |
What Is the Step-by-Step Construction Sequence?
Build order matters because each stage protects the next one from failure. Stake the footprint and overflow first, then shape grade, then install inflow armor, then plant and mulch. If you plant before flow paths are stabilized, the first strong rain can erase hours of work and compact the basin floor.
Day-by-day workflow for a typical homeowner install
Day 1: Stake perimeter, check final grade with a level board, and mark the overflow notch. This is the quality-control stage; do not rush it.
Day 2: Excavate and shape basin to target depth with smooth side transitions. Keep stockpiled soil away from curb lines and inflow channels.
Day 3: Install downspout extension or swale inlet and place stone splash control at entry and overflow points. Compact only where needed for edge stability.
Day 4: Plant by zone and apply shredded hardwood mulch in a thin uniform layer. Keep mulch away from direct inflow throat so water enters soil, not floating debris.
Day 5: Simulate flow with a hose test, confirm temporary ponding spread, and verify overflow leaves site safely.
This phased process also makes troubleshooting easier. If a test run shows uneven ponding, you can regrade before roots establish instead of disturbing mature plants later.
How Do You Maintain a Rain Garden in the First Two Years?
Maintenance is light but specific. New rain gardens need weed control, mulch touch-ups, and post-storm inspections until roots knit the profile. The first year is the highest risk for sediment clogging at inflow points and for washouts at overflow notches. Once vegetation fills in, maintenance demand usually drops sharply.
Seasonal maintenance cadence
- After large storms: Check inflow stones, overflow notch, and mulch displacement.
- Monthly in growing season: Remove invasive weeds before seed set and inspect for bare patches.
- Spring and fall: Refresh mulch lightly, prune dead stems, and recheck ponding duration.
- Annually: Re-run a simple drawdown observation after a moderate rain to confirm infiltration behavior is stable.
If you see ponding lasting more than two days repeatedly, do not immediately deepen the basin. First inspect for sediment sealing at inflow, mulch blockage, and grade drift that prevents water from spreading across the full footprint. Most fixes are surface corrections, not full rebuilds.
What Common Mistakes Cause Rain Garden Failures?
The most common failure pattern is combining undersized footprint with slow soil and deep excavation. Water concentrates, roots struggle, and the basin becomes visually muddy for long periods. A second frequent error is skipping overflow design, which causes water to overtop at random points and cut channels through lawn or mulch.
A third issue is planting by appearance alone. Decorative species can still work, but hydrology has to drive placement. Bottom-zone losses are expensive when homeowners repeatedly replace dry-site plants that cannot survive periodic saturation. Build the hydrologic skeleton first; aesthetics become easier once performance is stable.
FAQ: How to Build a Rain Garden
How big should a rain garden be for a typical home downspout?
Start around 10% to 20% of the roof area feeding that downspout, then adjust for infiltration rate. Faster soils can use smaller footprint areas while slower soils should use larger areas and conservative ponding depth. Use measured drawdown to confirm final performance, not just initial math.
Where should you not put a rain garden?
Avoid installation above septic fields, directly over utility corridors, or too close to foundations and retaining walls. Keep overflow away from structures and neighboring properties. When in doubt, move the basin farther from buildings and design a clear discharge route.
How deep should a rain garden be?
Most residential systems use shallow ponding depth, commonly around 4 to 8 inches, over a prepared soil profile. Depth should match infiltration and slope stability, not maximize storage through excavation alone. Broader and shallower usually performs better than narrow and deep.
Do rain gardens work in clay soil?
Yes, but clay sites usually require larger basin footprints, careful inlet stabilization, and strict sediment control. Expect slower drawdown and select plant species that handle periodic saturation. If drawdown remains too slow, consider engineered support options based on local guidance.
What plants are best for a rain garden?
Use moisture-tolerant species in the center, adaptable species on side slopes, and drought-tolerant species at the upper edge. Native perennials and grasses are often preferred for deep roots and season-long resilience. Keep planting density high enough to close canopy and suppress weeds quickly.